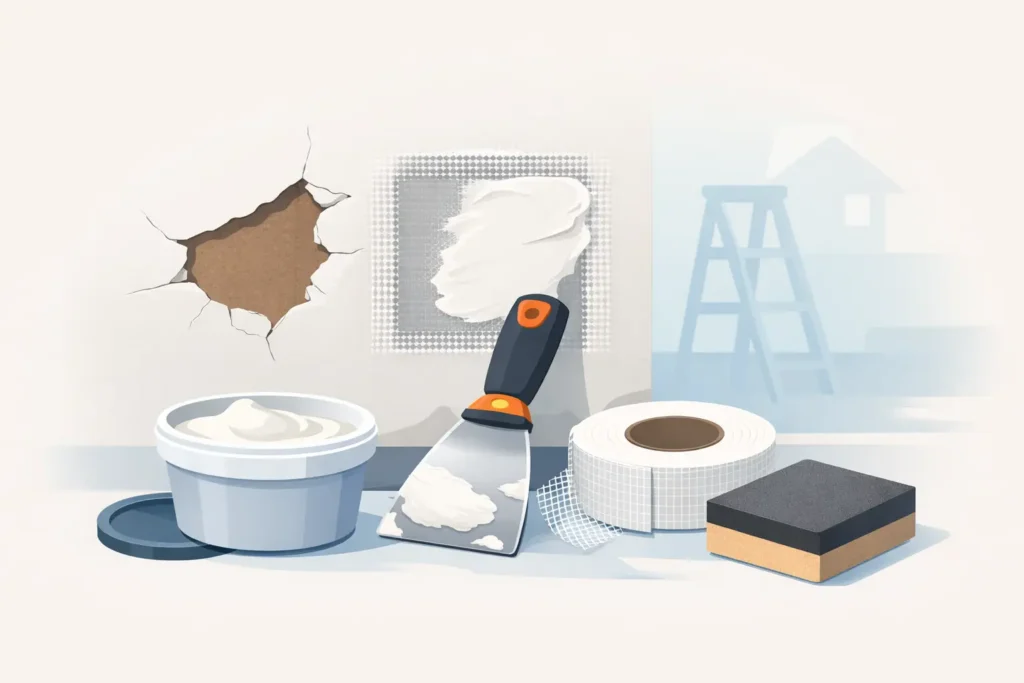
A drywall repair can look simple until the patch flashes through the paint, cracks along the seam, or leaves a visible hump on an otherwise smooth wall. Choosing the best drywall patch materials is what separates a quick cover-up from a repair that blends in and holds up. The right material depends on the size, location, and cause of the damage – not just what is easiest to grab at the store.
For Oklahoma homeowners and property managers, that distinction matters. Seasonal movement, door impacts, furniture damage, moisture problems, and settling cracks all call for a slightly different approach. A dependable repair begins by fixing the source of the issue, then using materials designed for that specific patch.
The Best Drywall Patch Materials Depend on the Damage
There is no single patch product that performs best in every situation. Lightweight spackle is excellent for a nail hole, but it is not a sound solution for a fist-sized opening. A mesh patch may cover a small hole quickly, yet it can leave a raised area if it is not feathered properly. Larger holes need actual drywall backing and joint treatment to restore strength.
Before buying materials, look closely at the damage. Is it a shallow dent, a popped nail, a hairline crack, a hole, or a soft section caused by water? Also check whether the wall has a smooth finish, orange peel, knockdown, or another texture. Matching the wall surface is often the step that determines whether the repair disappears or remains noticeable.
Lightweight Spackle for Small Holes and Dents
Lightweight spackle is one of the most useful materials for minor wall damage. It works well for nail holes, small screw holes, shallow gouges, and tiny dents. Because it dries quickly and sands easily, it is a practical choice when the repair is limited to the surface of the wall.
The trade-off is durability. Spackle is not intended to bridge wide gaps, reinforce cracks, or replace missing drywall. Applying it too thick can lead to shrinkage or cracking. For most small repairs, use a flexible putty knife, press in a thin coat, let it dry fully, sand lightly, and add a second coat only if needed.
For painted walls, a final coat of primer is still worth the time. Fresh patch material absorbs paint differently than the surrounding drywall, and primer helps prevent a dull or uneven spot after painting.
Joint Compound for Blending Wider Repairs
Premixed joint compound, often called drywall mud, is the better choice when a repair needs to be feathered across a larger area. It is commonly used over drywall tape, patch panels, and repaired seams. Unlike spackle, joint compound gives a finisher more working time and can be spread thin over a broad surface to make the transition from patch to wall nearly invisible.
All-purpose joint compound is a reliable general-use option for most homeowner repairs. It can be used for taping, filling, and finish coats, though it dries more slowly than lightweight products. Topping compound is easier to sand and works well for the final skim coat, but it is generally not the first choice for filling deeper areas.
For a clean result, apply several thin coats rather than one heavy coat. Each coat should extend a little farther beyond the previous one. This gradual feathering prevents the patch from looking like a raised rectangle once the wall is painted.
Setting-Type Compound for Deeper Fills and Faster Turnaround
Setting-type joint compound comes in powder form and hardens through a chemical reaction rather than simply air drying. It is often identified by its working time, such as 20-, 45-, or 90-minute compound. This makes it one of the best drywall patch materials for deeper dents, larger gaps, and repairs that need to be completed efficiently.
It dries harder than premixed compound and has less shrinkage, which makes it useful for a first fill coat. It is also a good option when humidity or cooler conditions may slow the drying time of standard premixed mud.
However, it requires more care. Once mixed, the clock starts, so only prepare the amount you can use during the stated working time. It is also harder to sand than regular joint compound. A common professional approach is to use setting-type compound for the initial fill, then finish with a thin coat of premixed joint compound for easier sanding and a smoother final surface.
Tape Matters as Much as the Patch Material
Cracks and seams need reinforcement. Filling them with compound alone may look good at first, but movement can cause the crack to return. Drywall tape helps distribute stress across the repaired area and gives the compound something to bond around.
Paper tape remains the dependable choice for flat seams and inside corners. It creates a strong, low-profile repair when properly embedded in joint compound. It does require a bedding coat of mud and a little more attention during installation, since bubbles can form if the tape is not pressed in evenly.
Fiberglass mesh tape is easier for many small repairs because it is self-adhesive. It is especially useful for small openings and certain crack repairs. For larger patches, mesh tape performs best when covered first with setting-type compound. Regular premixed mud can crack over some mesh repairs, particularly if the area sees movement.
Corner tape or metal-reinforced corner bead is necessary when damage affects an outside corner. These corners take frequent impacts and need a straight, durable edge. Trying to rebuild a badly damaged corner with compound alone usually creates a soft, uneven result that will chip again.
Self-Adhesive Mesh Patches Have a Place
A self-adhesive metal or fiberglass mesh patch can be a convenient solution for a small hole, often up to a few inches wide. It provides a backing surface so compound can span the opening without falling through. These patches are practical for accidental doorknob damage, small wall penetrations, and similar repairs.
Their limitation is profile. The patch sits on top of the existing wall, so the repair must be feathered well beyond its edges. If the compound is applied too narrowly, the outline of the patch will show after painting. Use a wide drywall knife and build the repair in thin layers, extending each coat farther out.
For holes larger than a few inches, a cut-in drywall patch is usually the stronger and better-looking option. The damaged area should be cut into a clean square or rectangle, supported with wood backing or drywall clips, and fitted with a new piece of matching drywall. Tape and finish the seams just as you would a new section of wall.
Drywall Panels and Backing for Larger Holes
When drywall is broken, crushed, or missing, no amount of spackle can restore its original strength. A replacement drywall piece is the right material for larger damage. Matching the existing drywall thickness is critical. Most residential walls use either 1/2-inch or 5/8-inch drywall, while ceilings and fire-rated assemblies may have different requirements.
Wood backing strips can be installed behind the opening to support the new patch. Drywall repair clips are another option for smaller cutouts. Once the new piece is secured, tape the seams, apply joint compound in multiple coats, sand, prime, and match the existing paint and texture.
If the hole is near electrical wiring, plumbing, or a vent, work carefully before cutting. Damage in these areas can involve more than a wall surface repair.
Do Not Skip Primer, Texture, and the Right Sandpaper
Even the best patch material can look unfinished without the final steps. Fine-grit sandpaper, usually in the 150- to 220-grit range, helps smooth dried compound without digging into the surrounding paper face of the drywall. Sand only enough to remove ridges and blend edges. Over-sanding can expose tape or create a low spot that becomes visible under paint.
Primer is essential over patched drywall. It seals the porous compound and helps the finish coat achieve a consistent sheen. This is especially important with satin, semi-gloss, or darker paint colors, which can reveal every uneven edge.
Textured walls need one additional step. Orange peel, knockdown, and other textures should be matched before painting. A smooth patch on a textured wall is just as noticeable as a poorly sanded patch. Test the texture material on cardboard first so you can adjust the pattern before applying it to the wall.
When a Professional Repair Is the Better Material Choice
Some drywall damage points to a bigger problem. Stains, soft drywall, recurring cracks, bulging seams, mold concerns, or holes near structural framing should be evaluated before patching. Covering water-damaged drywall without correcting the leak can trap the problem behind a fresh finish.
Large repairs also require skill in framing, taping, texture matching, and painting. For homeowners who want the repair to blend in without repeated sanding and repainting, a professional drywall crew can save time and prevent visible callbacks. KCS Drywall approaches repairs with the same attention to clean preparation and durable finishing used on larger drywall projects.
A good patch should not simply fill a hole. It should restore a flat, stable surface that looks right under natural light, holds paint evenly, and gives you confidence that the repair is built to last.