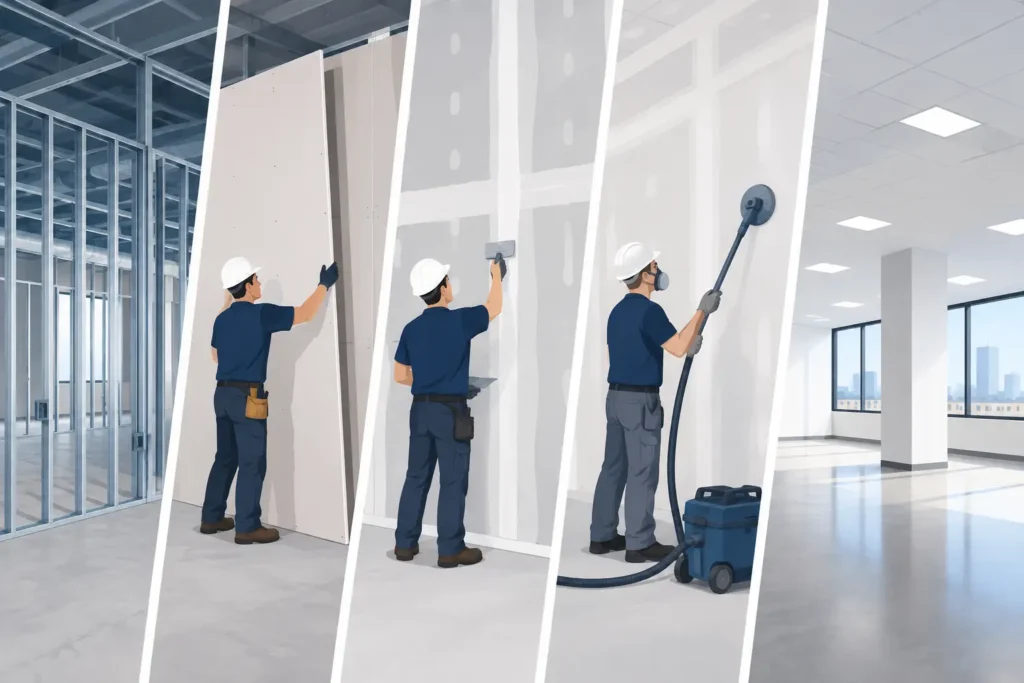
A commercial space can look nearly complete while still depending on the work behind the walls. Framing must be straight, the correct board must be installed in the right locations, and every joint must be finished to a standard that holds up under bright lights and daily traffic. This commercial drywall example shows how those moving parts come together on a typical office build-out.
For builders, property managers, and business owners, drywall is not simply a surface to paint. It affects fire protection, sound control, durability, inspection readiness, and the finished appearance of the space. A dependable drywall contractor keeps that work moving without creating delays for electricians, HVAC crews, painters, flooring installers, or the final walkthrough.
Commercial Drywall Example: A Small Office Build-Out
Consider a 6,000-square-foot office suite being converted from an open retail space into a professional services office. The plan includes a reception area, private offices, conference rooms, restrooms, a break room, storage, and a short corridor connecting each area.
The drywall scope begins after the major overhead work is underway. Metal studs create the new office walls, but the framing cannot be treated as a simple partition system. Door openings need to be square, corners need to line up, and walls need enough backing for cabinets, TV mounts, handrails, accessories, and other items shown on the plans.
In this example, the contractor walks the space with the general contractor before hanging board. That walk identifies problems that are far less expensive to fix early: a wall that is out of plumb, missing blocking around a door frame, an electrical box set too deep, or a duct that conflicts with the planned ceiling line. Clear communication at this stage protects the schedule later.
Matching the board to the room
Not every room receives the same drywall. Standard gypsum board may be appropriate for most private offices and reception walls, while moisture-resistant board is commonly specified for restroom and break-room areas. Fire-rated board may be required at certain corridors, utility rooms, tenant separations, or assemblies identified in the building plans.
The right material depends on the approved drawings, local code requirements, and the assembly being built. A fire-rated wall is more than a certain type of drywall. Stud spacing, layers of board, fastening patterns, penetrations, joint treatment, and approved details can all matter. Substituting materials or taking shortcuts can cause a failed inspection and a costly correction.
Sound control is another common consideration. A conference room beside private offices may require insulation in the wall cavity, sound-rated assemblies, or sealing details around penetrations. Drywall can improve privacy, but it only performs as intended when the whole wall system is installed correctly.
What Proper Installation Looks Like
Once the framing, in-wall electrical, plumbing, and mechanical work are ready, drywall installation can begin. Board is measured and cut to reduce unnecessary joints while still allowing for clean handling and proper placement. Crews use the appropriate screws and fastening schedule, keeping fasteners set properly without breaking the face paper.
On commercial projects, speed matters, but a fast install should not mean a careless one. Loose board, missed screws, unsupported edges, damaged corners, and uneven transitions show up later as cracks, ridges, or visible shadows after paint. Those defects are harder to correct once trim, flooring, and fixtures are in place.
Ceilings deserve the same attention. Depending on the design, drywall may be installed on soffits, bulkheads, or full ceiling areas. These details often frame ductwork, define reception areas, or create visual separation between spaces. Because they are highly visible, uneven framing and poor finishing stand out quickly.
Taping and finishing for the final look
After hanging, the board is taped and finished. Paper or mesh tape is embedded at joints, corner bead protects outside corners, and joint compound is applied in multiple coats to create a flat transition. Each coat needs adequate drying time before sanding and the next application.
For most commercial office interiors, a Level 4 finish is a common target. It provides a smooth, paint-ready surface for standard wall paints and typical lighting conditions. A Level 5 finish may be worth considering where there will be glossy paint, dark colors, critical lighting, or large walls that receive direct window light. It costs more and takes additional work, but it can prevent visible joint lines and surface imperfections in high-visibility areas.
The finish should match the expectations for the room. A storage room does not always need the same visual standard as a reception wall facing customers. Still, clean, consistent work throughout the building reflects well on the property and reduces avoidable punch-list items.
Coordination Keeps the Project Moving
Commercial drywall work sits between several trades. Electrical crews need access for boxes and wiring. Low-voltage installers may need pathways for data and security systems. HVAC penetrations must be addressed without compromising the wall assembly. Painters need a clean, dry surface before they begin.
That is why dependable scheduling matters as much as the drywall itself. The drywall contractor should know when the project is truly ready for board, when to return for repairs after inspections, and when final sanding can happen without another trade damaging the work. A clean jobsite and regular communication help everyone work more efficiently.
In the office build-out example, the crew may complete one wing while other trades finish rough-ins in another. This phased approach can save time, but only when the sequence is planned. Hanging drywall too early can lead to opened walls and rework. Waiting too long can delay painting, flooring, and occupancy.
Inspections and Punch Work Matter
Before walls are closed, the project may require inspections for framing, electrical, plumbing, or fire-rated assemblies. Once drywall is installed, it becomes much harder to verify what is inside the wall. Contractors who document work, follow approved details, and communicate with the general contractor help avoid surprises at inspection time.
After finishing, a careful walkthrough identifies items that need attention before paint or turnover. Common punch-list items include damaged corner bead, missed fasteners, uneven joints, poorly patched penetrations, and surface blemishes visible under work lights. Addressing these details promptly keeps a small correction from becoming a larger schedule issue.
Commercial spaces also take more wear than most homes. Corridor corners, reception areas, employee entrances, and utility rooms may benefit from durable corner protection or thoughtful material choices. The best solution depends on how the building will be used, not just how it looks on opening day.
Choosing a Commercial Drywall Partner
A quality commercial drywall contractor brings more than labor to the job. Look for a team that can read plans, coordinate with other trades, understand commercial assemblies, maintain a clean work area, and communicate clearly when conditions change. Fast quoting and reliable scheduling are valuable, but they should be backed by workmanship that will pass inspection and look right when the project is complete.
For Oklahoma City metro projects, KCS Drywall provides professional drywall installation, repair, framing, tape and texture, and finishing services with a focus on clean execution and dependable communication. Whether the project is a small office refresh or a larger commercial build-out, the goal is the same: deliver straight walls, durable finishes, and a jobsite experience that makes the next phase easier.
Before approving a drywall scope, walk the space, review the intended use of each room, and confirm the finish level and assembly requirements. That early attention gives the finished space a much better chance of looking professional long after the crews have left.