
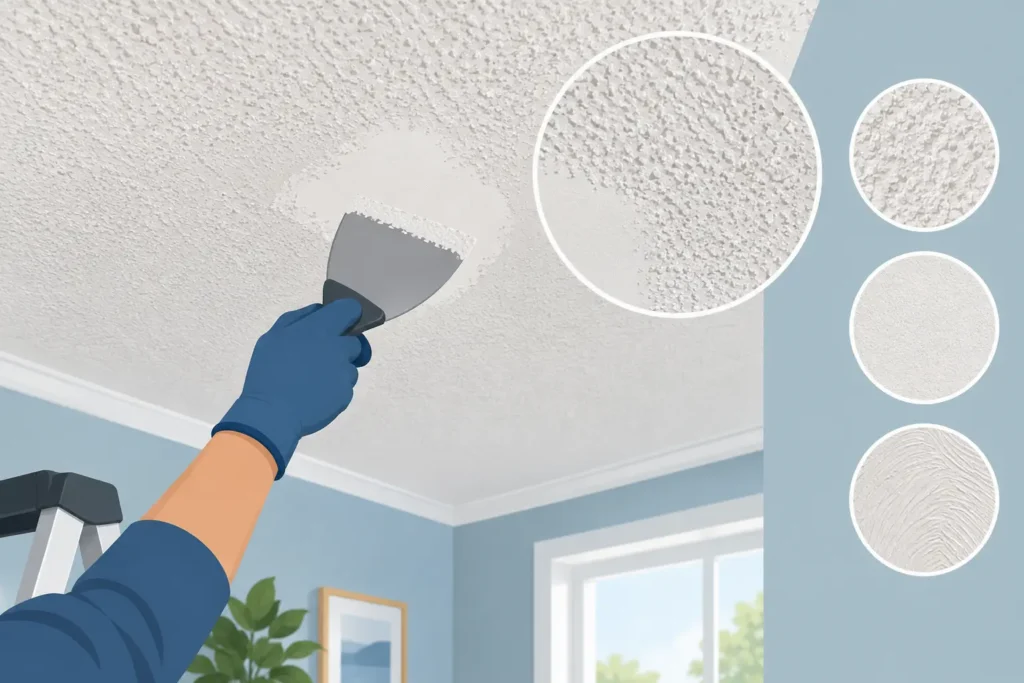
A ceiling repair can be structurally sound and still look unfinished if the texture does not blend. Learning how to match ceiling texture is less about covering a patch and more about recreating the same pattern, thickness, and paint sheen as the surrounding ceiling. A small difference in texture can stand out every time light crosses the room.
The best results come from slowing down before the texture goes on. Identify the existing finish, prepare the repair correctly, and practice the application method on scrap material first. If the damage is large, the ceiling has multiple repairs, or the texture is highly visible in natural light, professional finishing is often the more reliable choice.
Start by Identifying the Existing Ceiling Texture
Ceiling textures are not all applied the same way. Before buying materials, study an area away from the repair, preferably near a light fixture or window where the pattern is easy to see. Look at the size of the bumps, the spacing between them, and whether the pattern appears random or repeated.
Orange peel has small, scattered bumps that resemble the skin of an orange. Knockdown begins with sprayed texture, then is lightly flattened with a wide knife. Popcorn texture has larger, loose-looking particles and is common in many older homes. Stomp, crows-foot, and slap-brush finishes have visible brush marks and repeating patterns. A smooth ceiling may look simple, but it is often the hardest repair to hide because every sanding mark and uneven edge is visible.
Texture can also vary from room to room, even in the same house. A previous repair, remodel, or paint job may have changed the finish slightly. Match the ceiling that is there now rather than relying on what the texture is supposed to be called.
Prepare the Patch Before You Add Texture
Texture will not hide poor drywall work. If the repair is raised, hollow, cracked, or uneven at the edges, those problems will show through after texturing and painting.
The patched area should be dry, solid, and feathered smoothly into the existing ceiling. Sand the joint compound until there is no noticeable ridge where the repair meets the original surface. Run your hand across the area with your eyes closed. Your fingertips will often find a transition that your eyes miss.
Remove sanding dust with a vacuum attachment or a clean, dry cloth. Then prime the repaired drywall and joint compound. Primer keeps the patch from absorbing texture material and paint differently than the surrounding surface. Skipping this step can lead to a blotchy finish or texture that dries too fast.
Protect the room before starting. Cover floors and furniture, tape plastic along walls if you are spraying, and remove or cover light fixtures. Ceiling texture is messy by nature, especially when using aerosol cans or a hopper gun.
How to Match Ceiling Texture With a Test Board
The most useful step is also the one homeowners most often skip: make a test sample. Use a piece of scrap drywall, cardboard, or a primed board. Apply the same primer you used on the repair, then test your texture mixture, tool, and application pressure.
This gives you a chance to adjust the material before it is overhead. If the texture is too heavy, thin the mixture slightly or reduce the spray time. If it is too light, use a thicker mix, a larger nozzle, or a second light pass. Let the sample dry before comparing it to the ceiling. Wet texture can look very different from dry texture.
For spray textures, hold the can or hopper at a consistent distance from the board. Too close creates heavy blobs. Too far creates a dry, dusty pattern that may not bond well. Work in short passes and overlap lightly instead of trying to build the whole pattern with one heavy coat.
For hand-applied finishes, use the same tool shape and motion as the original texture. A stomp brush, for example, needs a controlled touch. Pressing too hard flattens the pattern, while pulling away too quickly can create pointed peaks that do not match the rest of the room.
Choose the Right Application Method
The correct method depends on the texture type and the size of the repair. Small patches can often be handled with an aerosol texture product or a small hand tool. Larger repairs usually need mixed texture material and a hopper gun to avoid a noticeable difference in pattern.
Orange Peel and Light Spray Texture
For orange peel, use a spray texture product or hopper gun with a fine setting. Apply several light passes, allowing the material to build naturally. The goal is an irregular pattern, not an even coat. Keep the spray moving past the edges of the repair so the new texture fades into the old.
Do not stop sharply at the edge of the patch. That creates a visible circle or rectangle. Instead, feather outward with lighter passes. This blending zone is what makes a repair look less obvious after paint.
Knockdown Texture
Knockdown requires timing. Spray the texture first, then wait until the peaks lose their wet shine but are still soft. Lightly drag a wide drywall knife across the peaks using a shallow angle. Wipe the knife often so dried material does not leave lines.
The amount of pressure matters. A hard pass makes the texture too flat; a soft pass may not knock down enough of the peaks. Practice on the test board until the flattened spots resemble the surrounding ceiling.
Popcorn Ceiling Texture
Popcorn repairs require a close match in aggregate size and coverage. Apply the material lightly at first, then add more only where needed. Heavy application can make the patch look denser and darker than the original ceiling.
Use caution with older popcorn ceilings. Some materials installed before the mid-1980s may contain asbestos. Do not scrape, sand, or disturb a suspected asbestos-containing ceiling without proper testing and qualified guidance. The health and safety trade-off is never worth taking a chance for a cosmetic repair.
Stomp and Brush Patterns
Brush textures must follow the existing pattern direction. Look for the spacing between stamps and the way the brush was twisted, pressed, or lifted. Start outside the patch and continue the pattern through it, rather than creating a separate pattern only inside the repaired area.
A patch may require partial retexturing beyond the repair itself. That extra blending area can feel like more work, but it is often what prevents a visible outline.
Let It Dry, Then Paint the Right Way
Allow texture to dry fully before painting. Drying time changes with product thickness, humidity, and airflow. Painting too early can soften the texture or cause it to pull away from the ceiling.
Once dry, apply ceiling paint with the same sheen as the existing surface. Flat ceiling paint is common because it helps reduce glare and hides minor imperfections. Using a different sheen is one of the fastest ways to make a well-matched texture look like a patch.
For the most consistent appearance, repaint the full ceiling from edge to edge. Spot painting can leave a noticeable color difference, even when the paint label matches. Ceiling paint fades over time from sunlight, cooking, smoke, and normal cleaning, so a fresh coat across the entire surface creates a more uniform result.
Use a roller with a nap thick enough to reach the texture without flattening it. Roll in steady sections and avoid overworking the paint. Excessive rolling can pull loose texture or leave heavier paint buildup on raised areas.
Common Problems That Make Repairs Stand Out
A patch can fail visually even when the texture itself is close. The most common issue is a repair that is too smooth around the edges. Texture needs to extend past the patch in a gradual blend, particularly on large ceilings or in rooms with strong side lighting.
Another common problem is using texture that is too uniform. Most ceiling finishes have natural variation from the original application. A perfectly even pattern can look artificial beside an older hand-applied texture.
Paint color and sheen also matter more than many people expect. A bright white patch against an aged off-white ceiling will draw attention from across the room. If paint matching is uncertain, repainting the full ceiling is usually the cleaner answer.
Finally, do not rush a ceiling repair because the patch seems small. Ceiling work is visible from every angle, and overhead lighting exposes flaws that walls often hide. Careful prep and a test application take time, but they protect the finished appearance of the room.
For homeowners and property managers who want a repair that blends cleanly, KCS Drywall provides professional drywall repair, tape, texture, and painting services throughout the Oklahoma City area. The right finish should make guests notice the room, not the repair.