
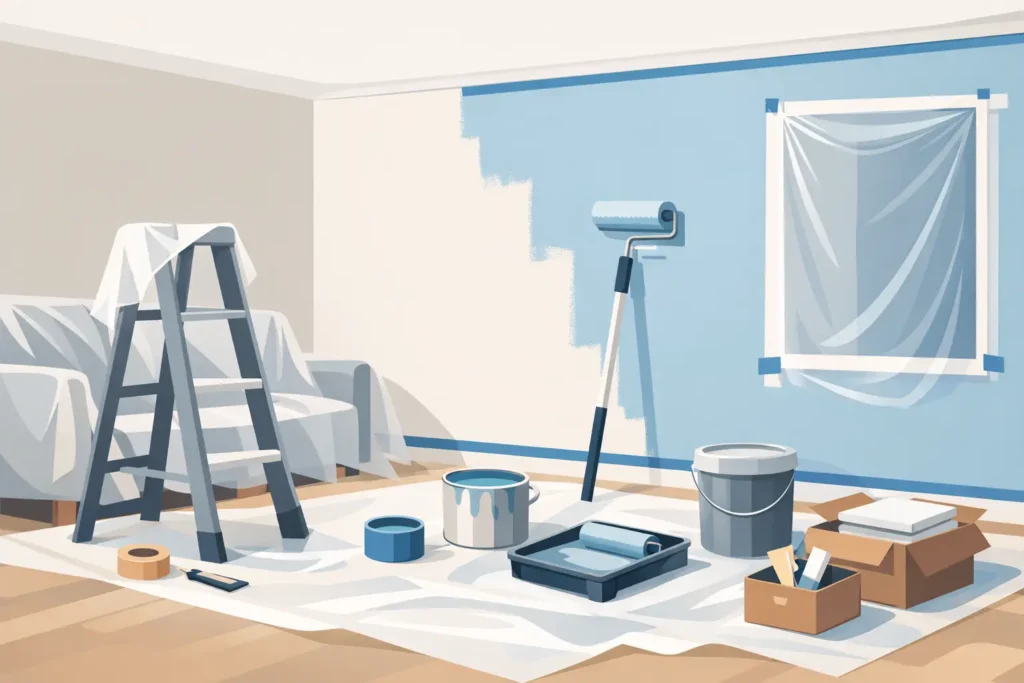
A fresh paint color can make a room feel completely different, but paint will not hide loose drywall tape, nail pops, greasy fingerprints, or uneven patches. This interior painting prep guide focuses on the work that protects your home and gives the finished color a smooth, durable appearance. Good preparation takes time, but it prevents the most common problems homeowners see after the painter leaves.
Start With a Clear Plan for Each Room
Before moving furniture or opening a paint can, decide what is being painted and what condition the surfaces are in. Walls, ceilings, trim, doors, cabinets, and built-ins may all need different products and prep methods. A ceiling with water staining, for example, needs the moisture source corrected and the stain sealed before it is repainted. Painting over the issue may make it disappear temporarily, but it often returns.
Walk each room in natural light and with the lights on. Look for dents, cracks, peeling paint, discoloration, popped fasteners, loose tape seams, and areas with a shiny or greasy film. Kitchens, bathrooms, hallways, and rooms near exterior doors usually need more cleaning than low-traffic bedrooms.
This is also the time to talk through expectations with your painting contractor. Point out areas that concern you, confirm whether closets and ceilings are included, and decide how furniture, wall hangings, and personal items will be handled. Clear scope and communication keep the project moving on schedule.
Protect Furniture, Floors, and Fixtures
A clean jobsite begins before surface repairs start. Remove small furniture, lamps, wall decor, curtains, and breakable items from the room whenever possible. Larger furniture can be moved to the center of the room and covered, but removing it entirely gives the crew better access to walls and reduces the chance of accidental damage.
Floors need more than a few scattered drop cloths. Canvas coverings are effective for hard floors because they stay in place and absorb small drips. Plastic may be useful under canvas or around large furniture, but plastic alone can become slippery and can allow spilled paint to travel. Carpet should be fully protected, especially near baseboards and doorways.
Cover or carefully mask outlets, switches, vents, fixtures, countertops, and built-in surfaces. Hardware can be removed when practical, particularly on doors and cabinets. Taking the extra time to protect edges and fixtures produces cleaner lines and less touch-up work later.
Clean the Surface Before Making Repairs
Paint needs a sound, clean surface to bond properly. Dust, smoke residue, cooking grease, hairspray, hand oils, and household cleaners can interfere with adhesion. A wall may look clean from across the room and still cause paint to peel or dry unevenly.
For most interior walls, use a mild cleaner and a damp sponge or microfiber cloth. Pay close attention to areas around light switches, door frames, kitchen backsplashes, and spots where children or pets regularly touch the walls. Rinse away cleaner residue when needed, then allow the surfaces to dry completely.
Bathrooms and kitchens may require a degreasing cleaner, while surfaces with mildew need a product designed to remove it safely. The underlying cause of mildew matters. If humidity, a plumbing leak, or poor ventilation is still present, address that issue before painting. Otherwise, the new finish may fail sooner than expected.
Repair Drywall Damage the Right Way
Painting is only as smooth as the wall beneath it. Small nail holes can often be filled with lightweight spackle, but dents, cracks, loose tape, and larger holes need a more deliberate repair. Rushing this step creates visible ridges, flashing, and rough patches once the new paint dries.
A proper drywall repair typically includes removing loose material, securing the damaged area, applying compound in thin layers, allowing each layer to dry, sanding the repair smooth, and blending the texture with the surrounding wall. The goal is not simply to fill a hole. The goal is to make the repaired area disappear after primer and paint are applied.
Watch for recurring cracks, especially above doors, near windows, or where walls meet ceilings. Some cracks are cosmetic, while others may be related to framing movement, moisture, or settling. A qualified drywall professional can help determine whether the repair needs reinforcement rather than another quick coat of compound.
If your home was built before 1978, take extra care around old peeling paint. Older coatings may contain lead. Avoid dry scraping or sanding suspected lead paint without appropriate testing and safe work practices.
Sand for Smoothness, Not Just Speed
Sanding removes raised edges and helps repairs blend into the wall. It also creates fine dust that can settle throughout the home if the area is not contained and cleaned properly. Use appropriate dust control, vacuum surfaces afterward, and wipe the walls with a clean cloth before priming.
Do not over-sand drywall paper or soften sharp wall corners. If the paper tears or becomes fuzzy, it may need to be sealed before painting. Careful sanding is one of the details that separates a clean finish from a surface that looks patched in certain lighting.
Prime Repairs and Problem Areas
Primer has a specific job: it creates a consistent surface for paint to bond to and helps prevent uneven absorption. Fresh drywall compound is porous, so spot-priming repairs is usually necessary. Without it, repaired areas can appear duller or shinier than the rest of the wall even after multiple coats of paint.
Stains from water, smoke, markers, or nicotine may require a stain-blocking primer. Standard wall paint is not always enough to prevent those stains from bleeding through. Dark colors, dramatic color changes, and glossy existing finishes can also benefit from the right primer.
The best choice depends on the surface and the problem being solved. One all-purpose primer may work well for ordinary repairs, while a water-stained ceiling or slick trim surface may require a specialty product. This is an area where using the right material can save time and prevent repainting later.
Caulk Gaps and Prepare Trim
Trim work deserves close attention because small gaps become more noticeable after fresh paint is applied. Inspect baseboards, crown molding, window trim, door casing, and joints where painted trim meets the wall. Flexible, paintable caulk can create a finished appearance at minor gaps, but it should not be used to hide major movement or damaged wood.
Scrape loose paint from trim, sand rough edges, and fill nail holes with the correct filler. Doors and trim with glossy finishes may need light sanding or a bonding primer so the new coating adheres well. If a door has dents, deep scratches, or loose veneer, repairs should be completed before the final painting process begins.
Choose Paint and Sheen for Real-Life Use
Color gets most of the attention, but sheen affects cleaning, durability, and how visible wall imperfections will be. Flat paint can minimize the look of minor surface flaws, making it a common choice for ceilings and some low-traffic walls. Eggshell and satin offer more washability for living areas, hallways, bedrooms, and family spaces. Semi-gloss is often used on trim, doors, and cabinets because it holds up well to cleaning.
There is a trade-off. Higher-sheen products are more durable, but they reflect more light and can reveal poor wall preparation. If walls have noticeable texture or repairs, a lower sheen may be the better choice. In busy homes with children, pets, or frequent guests, a washable finish may be worth the added reflection.
Test paint colors in the actual room before committing. Oklahoma sunlight can be bright and warm, while north-facing rooms may make a color look cooler or darker. View samples during the morning, afternoon, and evening, and consider how the color works with flooring, countertops, furnishings, and adjacent rooms.
Create the Right Conditions for Painting
Temperature, humidity, and airflow affect drying and curing. Keep the room within the paint manufacturer’s recommended temperature range and avoid painting in overly humid conditions when possible. Good ventilation helps, but strong direct airflow can cause paint to dry too quickly and make it harder to maintain an even finish.
Allow adequate dry time between coats. A surface may feel dry to the touch before it is ready for another coat, furniture, or routine cleaning. Rushing recoat times can lead to dragging, uneven coverage, or marks that show after the paint cures.
For occupied homes, plan the work in stages. Bedrooms, kitchens, and living spaces may need to remain usable during the project. A dependable painting team will help organize the schedule, protect the work area, and leave the space clean at the end of each day.
A quality paint job begins with the details most people do not notice at first: protected floors, clean walls, sound drywall repairs, sealed stains, and properly prepared trim. When those steps are handled carefully, the new color has the best chance to look sharp, wear well, and make the room feel finished for years to come.